
What is Lightroom?
Lightroom is a powerful photo editing software developed by Adobe Systems that is widely used by photographers and professionals to enhance and manipulate their images. With its range of tools and features, Lightroom allows users to adjust colors, exposure, sharpness, and other aspects of a photo. Additionally, its non-destructive editing capabilities set it apart from other editing software, preserving the original image while making changes. Lightroom also offers a seamless workflow for photographers, allowing them to import, edit, and export their images all in one place.
Overall, Lightroom is an essential tool for photographers looking to elevate their images, thanks to its user-friendly interface, wide range of editing options, and efficient workflow.
What is Lightroom Export?
When working with Lightroom, it's crucial to have a good understanding of Lightroom Export and its functionality. Lightroom Export is a useful feature that allows you to save and export your edited photos from Lightroom to various file formats, sizes, and resolutions. This feature enables you to prepare your images for different purposes, such as printing or sharing online.
With Lightroom Export, you have the flexibility to customize settings like file format (JPEG, TIFF, etc.), color space (sRGB, Adobe RGB, etc.), resolution (pixels per inch), and image quality. Additionally, you can resize and sharpen your images to ensure optimal print quality or web display.
By utilizing Lightroom Export effectively, photographers can streamline their workflow and deliver images that meet the specific requirements of different platforms and mediums. Whether you're printing your photos or sharing them online, Lightroom Export is a powerful tool that helps you achieve the desired results.
What are the Different Lightroom Export Options?
When exporting images from Lightroom, there are several export options to choose from. These options allow you to customize the format, quality, size, resolution, and color space of the exported image.
- File Type: Lightroom offers various file types, such as JPEG, TIFF, and PNG, to export your image. Each file type has its own advantages and uses.
- Image Quality: You can adjust the image quality based on your preferences or requirements. Higher quality settings result in larger file sizes but better image preservation.
- Image Size: Lightroom allows you to resize the image to your desired dimensions, making it useful for printing or displaying at specific sizes.
- Resolution: You can specify the resolution in pixels per inch (PPI) for the exported image. Higher resolutions are typically used for printing purposes to ensure sharpness and detail.
- Color Space: Lightroom supports different color spaces, such as sRGB, Adobe RGB, and ProPhoto RGB. The choice of color space depends on the intended use of the image.
By utilizing these export options, you can tailor the exported image to meet your specific needs and requirements.
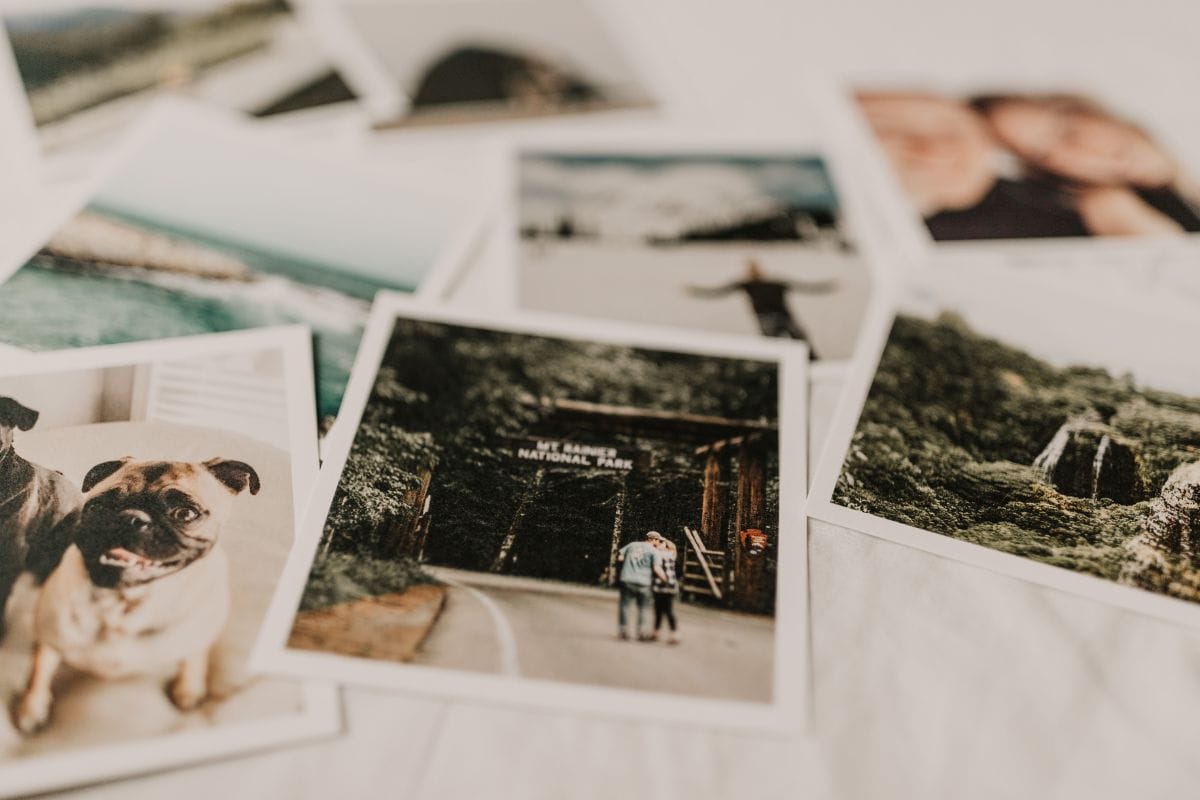
Why is Lightroom Export Settings Important for Print?
When preparing your photos for print using Lightroom, the export settings are crucial to achieving high-quality results. These settings determine the resolution, color profile, and file format of the exported image, making them essential for producing a great final print.
Why is it important to pay attention to Lightroom export settings for print?
- Resolution: Adjusting the resolution ensures that your image has the recommended 300 pixels per inch (PPI) for sharp and detailed prints.
- Color profile: Selecting the correct color profile, such as sRGB or Adobe RGB, ensures accurate color reproduction between your monitor and the final print.
- File format: While JPEG is commonly used for print due to its balance between file size and image quality, consider using TIFF for professional printing or further edits, as it offers lossless compression.
To optimize your Lightroom export settings for print, follow these suggestions:
- Resize your images to the desired print size using the specified dimensions and resolution from the print service provider.
- Use the appropriate color space and embed the color profile in the exported image.
- Adjust compression settings to find the right balance between file size and image quality.
- Preview your exported image to ensure it meets your expectations before sending it for print.
By paying attention to Lightroom export settings, you can ensure that your printed photos look their best.
What are the Recommended Lightroom Export Settings for Print?
When preparing your photos for print, it is important to use the proper export settings in Lightroom to ensure the best possible results. In this section, we will discuss the recommended Lightroom export settings for print, including the optimal file type, image quality, size, resolution, and color space. By following these guidelines, you can ensure that your printed photos look just as stunning as they do on your screen. So let's dive in and discover the key settings for achieving high-quality prints from Lightroom.1. File Type
When exporting images from Lightroom for print, it is important to choose the right file type to maintain quality and compatibility. Here are the steps to consider:
- Start with a high-quality image: Begin with a raw or high-resolution JPEG file to preserve details and minimize loss during export.
- Choose the appropriate file type: Select a file format that supports lossless compression, such as TIFF or PSD, to retain maximum image quality.
- Adjust image quality: Set the compression level to the highest possible without significant loss in image quality.
- Resize the image: Determine the desired print size and resize the image accordingly, maintaining the aspect ratio.
- Set the correct resolution: For optimal print quality, set the resolution to the printer's recommended value, typically 300 pixels per inch (PPI).
- Choose the appropriate color space: Select a color space that matches the printing process, such as Adobe RGB or sRGB, to ensure accurate color reproduction.
By following these steps and considering the specific requirements of your print project, you can optimize Lightroom export settings for high-quality print results.
2. Image Quality
When it comes to exporting images from Lightroom, ensuring high image quality is crucial for optimal print results. Here are the steps to achieve the best image quality:
- Start with a high-quality image: Begin with a well-edited and properly optimized image in Lightroom.
- Choose the right file type: Select a file format that preserves image quality, such as TIFF or PSD.
- Adjust image quality: Set the image quality to the maximum level to minimize compression artifacts and ensure high quality.
- Resize the image: Resize the image to the desired print dimensions while maintaining the original aspect ratio.
- Set the correct resolution: For print, use a resolution of 300 pixels per inch (PPI) to ensure sharpness and detail.
- Choose the appropriate color space: Use the Adobe RGB or ProPhoto RGB color space for accurate color representation.
By following these steps, you can optimize your Lightroom export settings to achieve the best image quality for print. Remember to test and adjust these settings based on your specific printing method and paper type to ensure the best results.
3. Image Size
When setting up Lightroom export settings for print, image size plays a crucial role in ensuring your printed photos look their best. Here are the steps to consider when adjusting the Image Size:
- Start by assessing the desired print size and resolution.
- In Lightroom's Export dialog box, go to the Image Sizing section.
- Choose the appropriate sizing option, such as "Width & Height" or "Long Edge."
- Enter the desired dimensions for your print. Use inches or centimeters for physical sizes, or pixels for digital sizes.
- Ensure the "Resolution" option is set to the recommended value for print, typically 300 pixels per inch (ppi) for high-quality results.
- If needed, enable the "Resize to Fit" option to automatically adjust the Image Size while maintaining the aspect ratio.
- Preview the Image Size changes in the Export dialog box or by using the Loupe view in Lightroom's Library module.
- Make any necessary adjustments to the Image Size settings to achieve the desired output.
- Once satisfied, proceed with exporting the image for printing.
The evolution of digital photography has led to the need for specific Image Size settings for different purposes, including print. Ensuring the correct dimensions and resolution not only guarantees optimal print quality but also allows for accurate cropping and resizing without compromising the overall visual impact of your photographs.
4. Resolution
Resolution is a crucial aspect to consider when exporting images for print using Lightroom. It plays a significant role in determining the level of detail and sharpness in the final printed image. To achieve the best results, it is important to follow these guidelines:
- Determine the required resolution: Take into account the printing method and desired print size. Generally, a resolution of 300 pixels per inch (PPI) is recommended for high-quality prints.
- Resize the image: Make sure the image size in Lightroom's export settings matches the desired print dimensions. Resizing the image before exporting helps maintain the intended resolution.
- Set the correct resolution: In the export settings, adjust the resolution to the recommended value of 300 PPI. This will ensure that the printed image appears sharp and detailed.
- Check for any color shifts: When resizing or adjusting the resolution, keep an eye out for any color shifts or loss of image quality. It is crucial to maintain the original colors and details during the export process.
By following these steps and taking into consideration the specific resolution requirements for your print project, you can ensure that your images are optimized for high-quality prints.
5. Color Space
When setting up Lightroom export settings for print, choosing the appropriate color space is crucial for achieving accurate and vibrant colors in your printed images. Here are the steps to consider:
- Start by selecting the right color space for your intended print. The most commonly used color spaces for print are sRGB and Adobe RGB.
- If you're printing with a professional printing service, check their specifications or consult with them to determine the recommended color space.
- In Lightroom, go to the Export dialogue box and navigate to the "File Settings" section.
- Under the "Color Space" dropdown menu, select the desired color space for your print.
- Ensure that the color profile is embedded in the exported file for accurate color reproduction.
- Preview your exported image to confirm that the colors appear as desired.
By following these steps, you can ensure that your printed images maintain their intended colors and accurately represent your creative vision.
The concept of color spaces dates back to the late 19th century when scientists and artists began to explore the possibilities of accurately representing colors. Over time, various color models and spaces were developed, each offering unique advantages for different applications. Today, color spaces like sRGB and Adobe RGB play a crucial role in digital photography and print production, allowing photographers and designers to maintain color consistency and fidelity across different devices and mediums.
How to Set Up Lightroom Export Settings for Print?
When it comes to printing your photographs, having the right export settings in Lightroom is crucial for achieving the best results. In this section, we will guide you through the process of setting up your Lightroom export settings for print. From starting with a high-quality image to selecting the appropriate color space, we will cover all the essential steps to ensure your print looks stunning. So let's dive in and discover how to make the most out of your Lightroom export settings for print.1. Start with a High-Quality Image
To ensure the best possible print results in Lightroom, it is crucial to begin with a high-quality image. Follow these steps to start with an optimal image:
- Capture in RAW format: RAW files preserve more image information and offer more flexibility for adjustments during post-processing.
- Ensure proper exposure: Take well-exposed photos to retain details in both highlights and shadows.
- Adjust white balance: Accurate white balance ensures accurate color rendering in the final print.
- Utilize a tripod: Minimize camera shake and achieve maximum sharpness by using a tripod.
- Keep the ISO low: Lower ISO values reduce digital noise and preserve image details.
- Choose appropriate lenses: High-quality lenses with good sharpness and minimal distortion enhance overall image quality.
Beginning with a high-quality image sets the foundation for excellent print results, allowing for fine adjustments and preserving details throughout the editing process.
Fact: Starting with a high-quality image can result in sharper prints with better color accuracy and more detailed textures.
2. Choose the Right File Type
Choosing the right file type is crucial when exporting images from Lightroom for print. Follow these steps to ensure you select the appropriate file type:
- Start by editing your image in Lightroom, making any necessary adjustments.
- Once you're satisfied with the edits, go to the Export dialog box.
- Under the File Settings section, select the file format that best suits your needs, including the option to "Choose the Right File Type." The most common file types for print are JPEG and TIFF.
- If you're looking for a smaller file size, choose JPEG. It offers high compression and is widely supported by printers and publishing platforms.
- For maximum image quality and flexibility, choose TIFF. It is a lossless format that preserves all the details and allows for further editing without loss of quality.
By following these steps and selecting the appropriate file type, specifically "Choosing the Right File Type," you can ensure that your exported images from Lightroom are suitable for printing.
3. Adjust Image Quality
When preparing your images for print in Lightroom, adjusting the image quality is a crucial step. Follow these steps to ensure optimal results:
- Start with a high-quality image: Begin with a well-exposed and properly edited image to maintain the highest possible image quality.
- Choose the right file type: Select a file format that preserves image quality, such as TIFF or PSD, instead of JPEG which may result in image degradation.
- Adjust the image quality: Use the "Quality" slider to control the amount of compression applied to the image. A higher quality setting will result in a larger file size but better image detail.
- Resize the image: If necessary, resize the image to the desired print dimensions. Be mindful of maintaining the aspect ratio to avoid distortion.
- Set the correct resolution: Set the resolution to match the print output requirements. Typically, a resolution of 300 pixels per inch (ppi) is recommended for high-quality prints.
- Choose the appropriate color space: Select a color space that is suitable for printing, such as Adobe RGB or sRGB, to ensure accurate color reproduction.
To optimize your Lightroom export settings for print, consider using presets for consistent results, test and adjust settings based on your specific needs, take into account the printing method and paper type, and always check for any color shifts before finalizing your prints.
4. Resize the Image
When resizing an image in Lightroom for print, it's important to follow these steps:
- Open the image in Lightroom's Develop module.
- Click on the Crop & Straighten tool.
- Select the Aspect Ratio option and choose custom dimensions based on your printing requirements.
- Drag the image within the crop frame to adjust the composition if needed.
- Ensure the "Constrain to Image" option is checked to avoid cropping important details.
- Click on the "Done" button to apply the resize and maintain the quality and clarity of the image.
- Go to the Export dialog by pressing Ctrl + Shift + E (on Windows) or Command + Shift + E (on Mac).
- Set the desired output settings like file type, image quality, resolution, and color space.
- Choose the destination folder and click on the "Export" button to save the resized image.
Following these steps will ensure that the image is properly resized for printing purposes, maintaining its quality and clarity.
5. Set the Correct Resolution
To ensure the correct resolution for printing in Lightroom, follow these steps:
- Begin with a high-quality image: Start with an image of high resolution to maintain clarity and detail.
- Select the right file type: Choose a file type that supports lossless compression, such as TIFF or PSD, to preserve the quality of the image.
- Adjust image quality: Set the image quality to the highest level to maintain sharpness and minimize artifacts.
- Resize the image: Resize the image according to the desired print dimensions, taking into consideration the target resolution.
- Set the correct resolution: Set the resolution to the recommended value for printing, usually 300 pixels per inch (ppi).
- Choose the appropriate color space: Select a color space that is compatible with your printer and the intended output, such as sRGB or Adobe RGB.
By following these steps, you can ensure that your exported images from Lightroom have the correct resolution for optimal print quality.
6. Choose the Appropriate Color Space
Choosing the appropriate color space in Lightroom is crucial for achieving accurate and consistent colors in your printed images. Follow these steps to select the right color space:
- Start by opening the image in Lightroom and navigating to the Export dialog.
- In the Export dialog, find the Color Space dropdown menu and click on it.
- From the available options, select the most suitable color space based on your printing needs.
- For most printing purposes, sRGB is the recommended color space as it is widely supported and ensures consistent colors across different devices.
- However, if you are working with a professional printing lab or require a wider color gamut, you may choose Adobe RGB or ProPhoto RGB.
- Make sure that the chosen color space matches the color profile of your printer or printing lab for accurate color reproduction.
By following these steps and selecting the appropriate color space, you can ensure that your printed images display accurate and vibrant colors.
Tips for Optimizing Lightroom Export Settings for Print
When it comes to preparing your photos for print, using the right export settings is crucial. In this section, we'll discuss some helpful tips for optimizing your Lightroom export settings specifically for print. From using presets to considering the printing method and paper type, we'll cover all the key factors to keep in mind. Plus, we'll also touch on how to check for any color shifts that may occur during the printing process. Let's dive in and ensure your prints come out looking their best.1. Use Presets
Using presets in Lightroom can greatly streamline your workflow and ensure consistent results when exporting images for printing. Here is a step-by-step guide on how to effectively use presets:
- Start by creating your own custom preset or choose from the pre-installed ones in Lightroom.
- Apply the preset to your image by selecting it from the develop module.
- Adjust the settings within the preset to fine-tune the look of your image.
- Preview the changes and make any necessary adjustments to achieve the desired outcome.
- Save the preset with a descriptive name for future use.
By utilizing presets, you can save time and effort by applying consistent settings to multiple images with just a few clicks. It also allows you to experiment with different looks and styles, helping you develop your own unique aesthetic. Remember to regularly update and refine your presets to adapt to changing printing needs and techniques.
2. Test and Adjust Settings
When it comes to setting up Lightroom export settings for print, it's crucial to test and adjust the settings to ensure optimal results. Here are the steps to follow:
- Start with a high-quality image to maintain the best possible print quality.
- Choose the right file type, such as JPEG or TIFF, depending on the specific requirements of your print service.
- Adjust image quality to determine the level of compression and retain as much detail as possible.
- Resize the image to the desired dimensions for printing.
- Set the correct resolution, typically 300 pixels per inch for high-quality prints.
- Choose the appropriate color space, usually Adobe RGB or sRGB, depending on the printing method and paper type.
Remember to experiment with different settings and preview the results before finalizing your export settings. By testing and adjusting the settings, you can ensure that your prints accurately represent your edited images.
Similarly, one photographer shared their experience of overlooking the importance of testing and adjusting settings. They eagerly sent their images for print without double-checking the export settings, resulting in disappointing prints with washed-out colors. Lesson learned: always take the time to test and adjust settings to achieve the best print quality possible.
3. Consider the Printing Method
Consider the printing method when configuring your Lightroom export settings for print. Different printing methods have specific requirements to achieve optimal results. Here are some steps to follow:
- Understand the printing method: Familiarize yourself with the specific printing method you will be using, whether it is inkjet or offset printing.
- Research recommended settings: Look for recommended export settings specific to the printing method you will be using. Different methods may have varying requirements for image resolution, color profiles, or file formats.
- Adjust color profiles: Choose the appropriate color profile for your printing method to ensure accurate color reproduction. Depending on the printing method, color profiles like sRGB or Adobe RGB may be suitable.
- Set image resolution: Determine the optimal resolution for your printing method. Larger prints or those with intricate details may require higher resolution images.
- Consider paper type: Keep in mind the type of paper or material you will be printing on. Different papers may require adjustments to settings such as sharpness or saturation.
By taking into account the printing method and adjusting your Lightroom export settings accordingly, you can ensure that your prints turn out as intended and achieve the best possible quality.
4. Consider the Paper Type
When preparing to export images from Lightroom for printing, it is important to take into account the type of paper that will be used. The paper type can greatly impact the appearance and quality of the final printed image. Follow these steps for optimal results:
- Research paper options: Take the time to explore the various paper types available on the market, such as glossy, matte, or fine art papers.
- Consider the image style: Choose a paper type that complements the style of your image. For example, a vibrant and colorful image may look best on glossy paper, while a black and white image may benefit from a matte paper.
- Think about texture: Some papers have a textured surface, which can add depth and character to certain images. Consider whether a textured paper would enhance the overall look and feel of your print.
- Test prints: Before committing to a specific paper type, it is recommended to print test images on different paper options to see how they appear. This allows you to make any necessary adjustments or choose a different paper type.
Pro-tip: The paper type you choose can have a significant impact on the final result of your prints. Don't underestimate its importance in making your prints truly stand out.
5. Check for Color Shifts
When preparing images for print using Lightroom, it is crucial to check for color shifts to ensure accurate color reproduction. Follow these steps to check for color shifts:
- View the image at 100% zoom to see the fine details.
- Compare the image on your screen with a printed sample or proof.
- Examine areas with vibrant or subtle colors, as these are more prone to shifts.
- Look for any differences in hue, saturation, or brightness between the screen and print.
- Adjust the white balance if necessary to correct any color casts.
- Regularly calibrate your monitor to maintain color accuracy.
Checking for color shifts ensures that your printed images accurately reflect your intended colors and avoids any unpleasant surprises. By following these steps, you can ensure that your prints achieve the desired results and accurately represent the original image.
In the early days of color printing, color shifts were a common problem. Printers had to carefully adjust the color settings to compensate for the limitations of the printing process. However, advancements in technology and color management have greatly reduced the occurrence of color shifts. Modern printing techniques, combined with accurate color profiles and careful monitoring, have significantly improved color accuracy in printed materials. Today, checking for color shifts is an essential step in the printing workflow to ensure that the final prints accurately represent the original image.