The Best Kodak Portra 400 Lightroom Presets
With the resurgence of film photography and the unique, timeless aesthetic it provides, photographers are constantly seeking ways to replicate the magic of analog in their digital images. One of the most sought-after film looks is that of Kodak Portra 400, a renowned film for its warm and vibrant tones, user-friendly nature, and extensive exposure latitude. But how do you achieve that coveted Portra 400 look in your digital photos?
Enter the world of Portra 400 Lightroom preset, the one-stop solution for transforming your digital images into classic film masterpieces. Let’s dive into the hype of Portra 400 and explore some of the best presets available, along with tips on creating your own and enhancing your workflow.
Key Takeaways
-
Kodak Portra 400 film has become popular for its unique characteristics, and Lightroom presets have been developed to replicate the aesthetic.
-
The resurgence of analog photography has led to an increase in popularity for film presets such as Portra 400.
-
Comparing different types of film presets can help photographers determine which preset is best suited for their style and needs.
Understanding the Hype of Portra 400
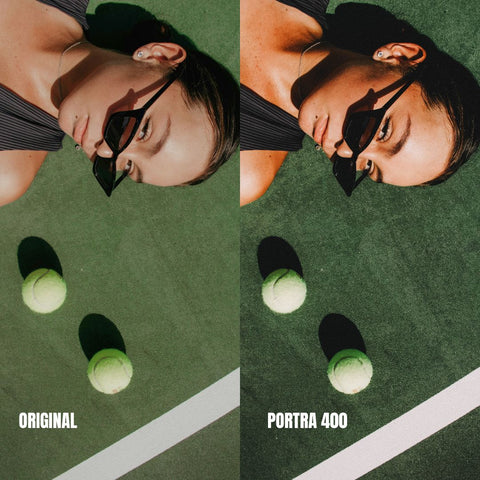
Edited with "Portra AI Preset Bundle"
The popularity of Kodak Portra 400 film lies in its unique characteristics, blending warm-tonality with moderate contrast and saturation, making it a versatile choice for a range of photography genres. As the resurgence of analog photography gains momentum, many digital photographers are seeking ways to emulate the film look in their images with presets. This is where Portra 400 Lightroom presets come into play, providing digital filters that replicate the aesthetic of this beloved film and allowing photographers to achieve a cohesive and timeless look across their portfolio.
But what exactly distinguishes Portra 400 from other films, and how do these presets achieve their effects? Let’s explore further.
What is the Classic Portra 400 Look?
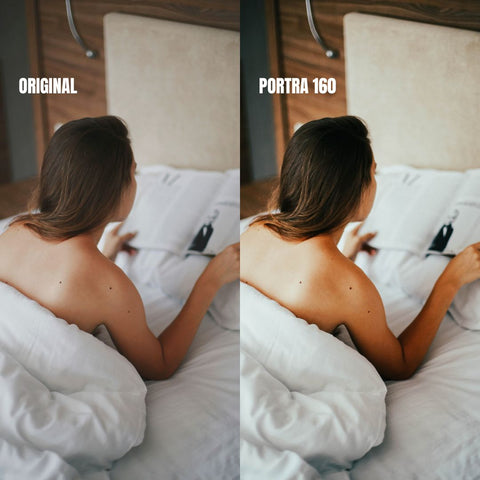
The distinct visual features of Portra 400 film set it apart from other films, characterized by vivid hues, high contrast, and subtle grain. Its vibrant color palette features bright and saturated hues, while its notably high contrast provides a sharp and vivid look.
The fine grain of Portra 400 adds a smooth, natural appearance to images, further enhancing the overall aesthetic and making it a popular choice for fine art photography.
Comeback of Analog Photography
The resurgence of analog photography, especially among younger enthusiasts, has significantly contributed to the rising popularity of film presets such as Portra 400. The authentic look and nostalgic feel of film photography provide a unique and timeless aesthetic that many photographers find appealing, despite the convenience and advancements of digital photography. With the recent hype, the actual film stock is often sold out and hard to find.
This resurgence has also led to a positive influence on digital photography trends, with many digital photographers incorporating film-inspired techniques into their work, such as utilizing film grain and light leaks to craft a more genuine look, reminiscent of actual film.
Emulate the Film Look With Presets
Lightroom presets offer an easy solution for emulating the look of Portra 400 film in digital photographs. These digital filters can be applied to photos swiftly and effortlessly, adjusting color settings, refining grain and contrast, and even batch editing photos to achieve a consistent look across multiple images.
Available Portra 400 Lightroom presets include:
-
Mastin Labs Portra Original
-
Daily Creativo Portra 400 Presets
-
Kodak Portra 400 Preset on Creative Market
-
Essential Portra 400 Preset by gridfiti
-
NATE Cam’s E-Chrome Lightroom Presets
-
Lizzie Peirce Portra 400 Preset
-
Kodak Portra 400 Presets by Ryan Porter.
Difference between Portra 400 and Portra 160
While both Portra 400 and Portra 160 are popular Kodak films, there are some key differences between the two. Portra 400 has a higher ISO of 400, making it more suitable for low-light conditions or situations requiring faster shutter speeds, while Portra 160 has a lower ISO of 160, resulting in finer grain and more precise color reproduction.
The higher ISO of Portra 400 provides an advantage in low-light settings, whereas Portra 160’s lower ISO yields finer grain and more accurate colors in well-lit conditions.
Best Portra 400 Lightroom Preset Packs
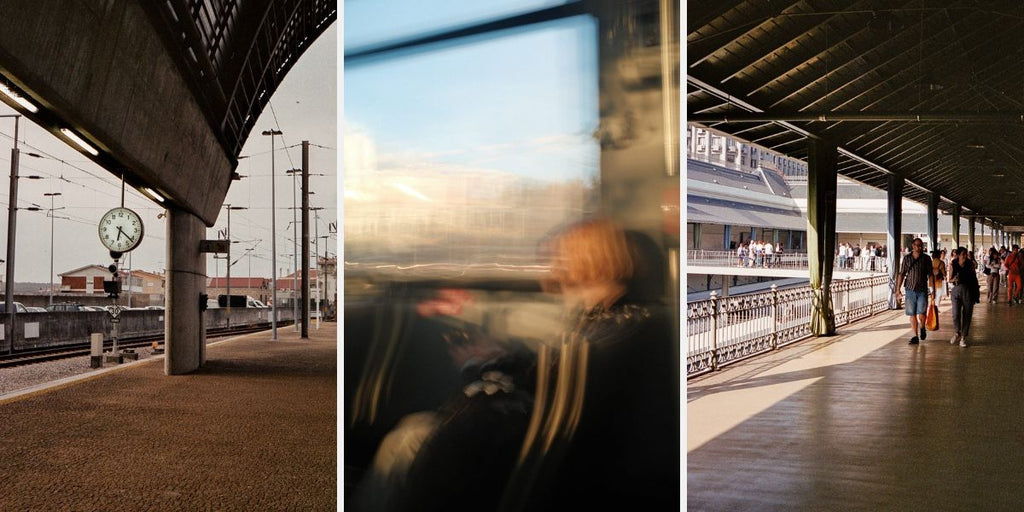
With numerous Portra 400 Lightroom presets available, finding the perfect one for your photography needs can be a daunting task. To help you navigate the world of Portra 400 presets, we have compiled a list of some of the best options on the market, each offering unique features to bring the classic Portra 400 look to your digital images.
Other presets bundles include:
-
Mastin Labs Portra Original
-
Daily Creativo Portra 400 Presets
-
Kodak Portra 400 Preset by El Oasis Market
-
Essential Portra 400 Preset by gridfiti
-
NATE Cam’s E-Chrome Lightroom Presets
-
Lizzie Peirce Portra 400 Preset
-
Kodak Portra 400 Presets by Ryan Porter
Let’s examine each of these preset packs, as well as other presets, in more detail.
Mastin Labs Portra Original
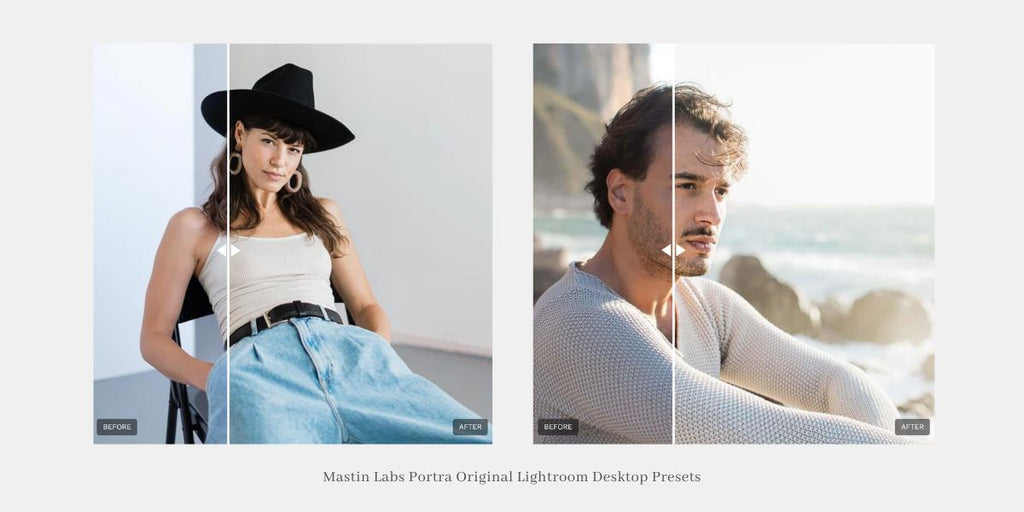
Mastin Labs’ Portra Original preset pack includes features such as:
-
Orange Reduction, which optimizes micro-contrast for studio strobe and flash photography
-
Dynamic Noise Reduction
-
Lens Correction
-
Auto Transform
This pack is inspired by the Fuji Frontier film scanner and offers a tone profile that corrects contrast while maintaining the look of the film.
Additionally, it offers grain settings that allow users to finish their look with 35mm or medium-format grain, further enhancing the film-like appearance.
Daily Creativo Portra 400 Presets
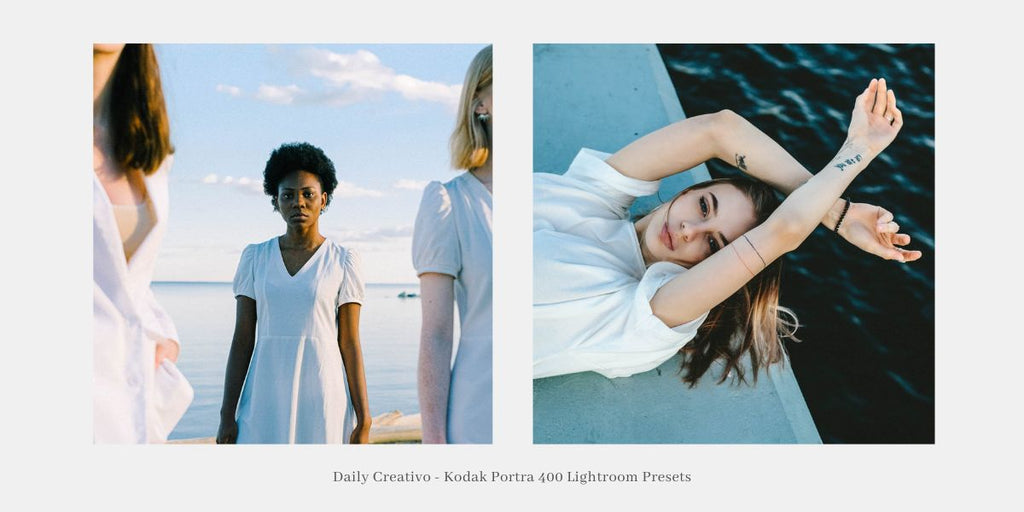
Daily Creativo’s Portra 400 preset pack is designed to provide photos with the light and airy feel that Portra is renowned for when the shutter is open a stop or two longer, yielding bright, vibrant, and detailed images.
This pack offers soft green and blue hues, giving photos a film-like appearance and allowing photographers to replicate the classic Portra 400 look with ease.
Kodak Portra 400 Preset by El Oasis Market
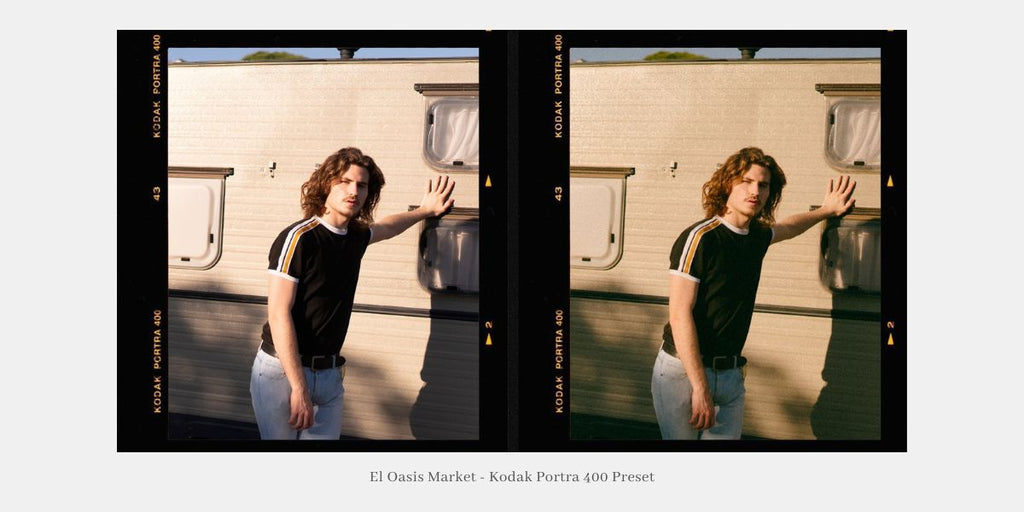
The Kodak Portra 400 Preset by El Oasis Market is a set of three presets designed to emulate the Portra 400 look, with a particular focus on warmer tints for skin tones. This preset pack provides a film-like look with vibrant tones and natural skin tones, and is available for both desktop and mobile use, allowing photographers to achieve the coveted Portra 400 aesthetic on-the-go.
The Kodak Portra 400 Preset is easy to use and provides a great starting point for
Essential Portra 400 Preset by gridfiti
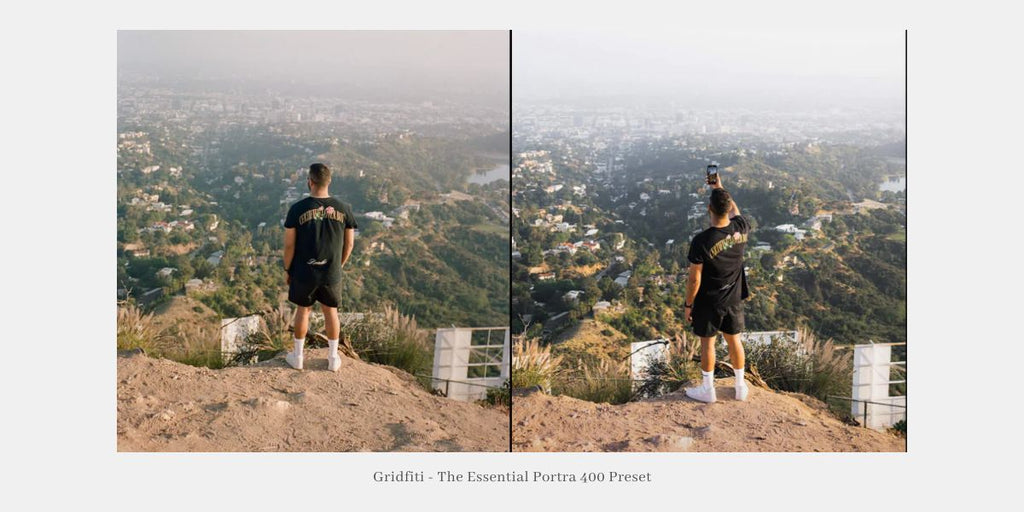
Gridfiti’s Essential Portra 400 Preset brings the classic film look to digital images, replicating the look of Portra 400 film with the following modifications:
-
Color saturation
-
Gentle contrast
-
400 ISO level grain
-
Additional elements
The preset was developed by carefully comparing and analyzing numerous Portra 400 film photos alongside their digital counterparts, and subsequently refining the preset to accurately reflect the Portra 400 look.
NATE Cam’s E-Chrome Lightroom Presets
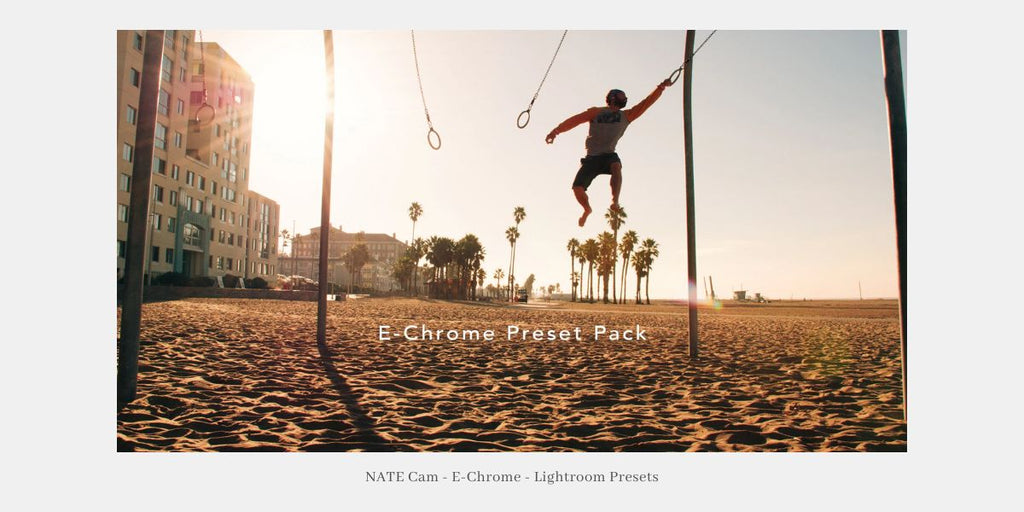
NATE Cam’s E-Chrome Lightroom Presets is a collection of 10 film presets inspired by classic analog films, designed to evoke the aesthetic of beloved films and generate nostalgic color palettes.
The “Perfect Portra” preset within this collection is specifically crafted to replicate the aesthetics of Kodak Portra 400 film, allowing photographers to achieve the classic Portra look with ease.
Lizzie Peirce Portra 400 Preset
Lizzie Peirce’s Portra 400 Preset is a vintage film look preset that replicates the appearance of Portra 400 film. Upon completion of the checkout process, a download link for the Lizzie Peirce Portra 400 preset will be emailed to the user, making it easy to access and apply to your digital photos.
Kodak Portra 400 Presets by Ryan Porter
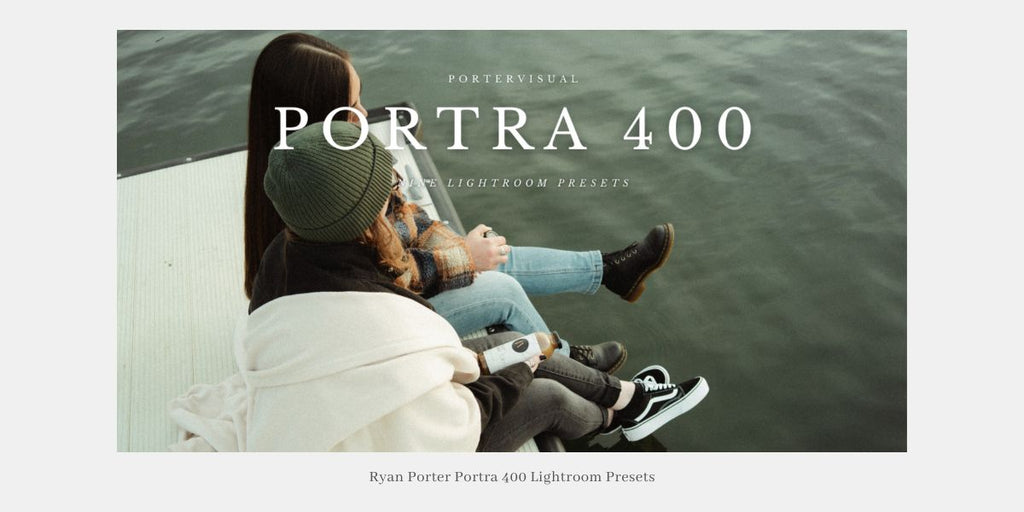
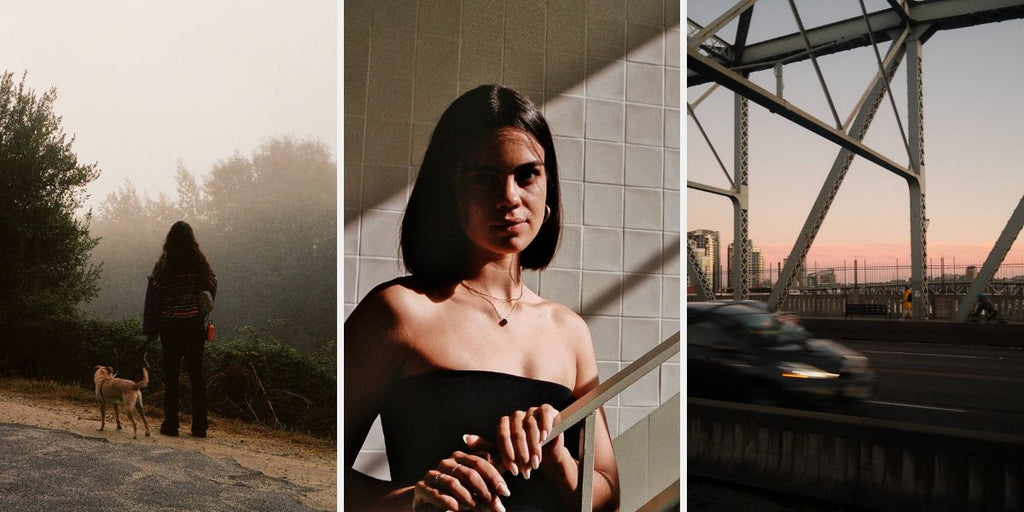
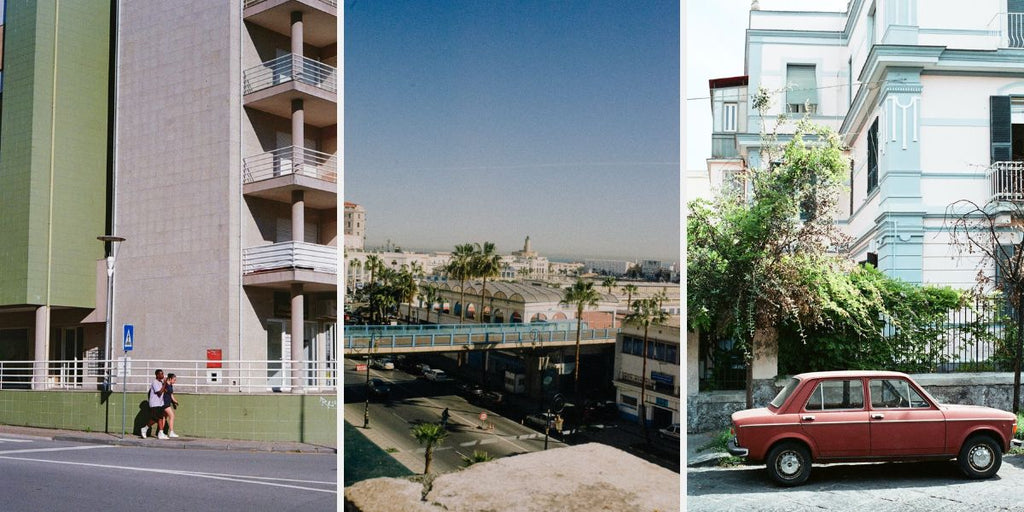
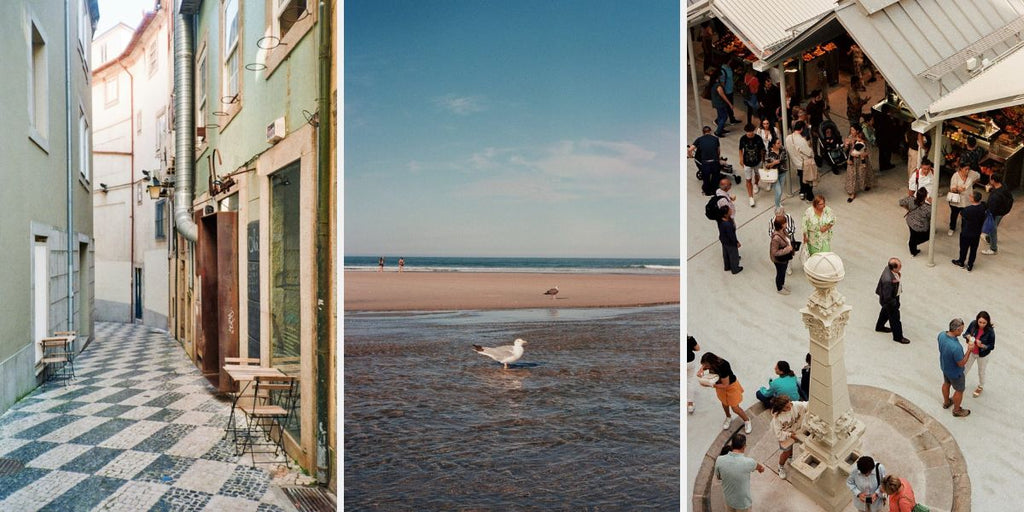
Kodak Portra 400 Presets by Ryan Porter is a collection of Lightroom presets inspired by the popular Kodak Portra 400 film. The presets are designed to provide an enhanced look to various types of photos, including:
-
Street photos
-
Landscapes
-
Nature
-
Portraits
This preset pack includes adjustments to cool or warm the tones of your photo, as well as an optional grain preset to further replicate the classic Portra 400 film look.
Creating Your Own Portra 400 Preset
Crafting your own Portra 400 preset in Lightroom can be a fulfilling endeavor, providing you the opportunity to tailor the aesthetics of your images to your personal style. By adjusting color settings, refining grain and contrast, and experimenting with different settings, you can achieve the perfect Portra 400 film look tailored to your unique photography needs.
How to Create the Perfect Film Look in Lightroom
To achieve the ideal film appearance in Lightroom, begin by modifying the contrast and clarity in the Basic panel, then proceed to desaturate warm colors in the HSL panel.
Next, adjust the tone curves to enhance shadows and highlights, and use tools such as Exposure, Dehaze, and Color to generate a realistic light leak effect.
Finally, utilize the Tonal Curves and HSL panels to refine the look, ensuring your images achieve that classic Portra 400 aesthetic.
Adjusting Color Settings
To emulate the Portra 400 look, follow these steps:
-
Enhance the soft green and blue hues in your images.
-
Add a medium amount of grain to your image.
-
Reduce the yellow and green tones in your images.
-
Adjust the hue, saturation, and luminance of the green and blue channels in the HSL panel to further emphasize the soft green and blue hues.
-
Use the Effects panel to add a medium amount of grain to your image.
Lastly, adjust the hue, saturation, and luminance of the yellow and green channels in the HSL panel to reduce the yellow and green tones.
Fine-Tuning Grain and Contrast
To fine-tune grain and contrast settings for your custom Portra 400 preset, increase the grain to add a film-like texture to your images, while decreasing the contrast to achieve a softer, more muted look.
Experiment with different grain and contrast settings to achieve the desired Portra 400 look, and remember that subtle adjustments can make a significant difference in the overall appearance of your images.
Mobile Portra 400 Presets: Editing On-the-Go
In the modern, fast-paced world, the capability to edit photos on-the-go has become indispensable. Mobile Portra 400 presets provide a convenient solution for photographers looking to achieve the classic film look on their smartphones and tablets, allowing you to edit your images anytime, anywhere.
With the help of mobile Portra 400 presets, you can quickly apply the film look to your images and maintain a consistent aesthetic across your portfolio even when you’re away from your desktop editing setup.
Download and Installation
Downloading and installing mobile Portra 400 presets is a breeze. Simply search for websites that offer Portra 400 presets for download, and select a website that provides the presets in DNG format.
Once the presets are downloaded, follow these steps:
-
Install the Lightroom mobile app on your mobile device if you haven’t already.
-
Import your photos into the app.
-
Apply the Portra 400 preset to your images.
-
Adjust the settings to achieve your desired look.
Now you’re ready to edit your photos with the classic Portra 400 film look on-the-go!
Enhancing Your Workflow with Portra 400 Film Presets

Employing Portra 400 film presets can substantially streamline your photo editing process, ensuring a consistent aesthetic across your images while also saving time and effort.
Applying a film-like look to your photos without having to manually adjust each setting can be a game-changer for photographers seeking a streamlined editing experience. Additionally, batch editing and customizing presets to suit your own style are just a few of the many benefits of using Portra 400 film presets in your workflow.
Batch Editing
Batch editing is a powerful tool that enables you to edit multiple images at once, applying the same set of edits or adjustments to all of them simultaneously. By using Portra 400 presets for batch editing, you can expedite the editing process and ensure uniformity across a series of images, saving time and delivering consistent results.
This approach is particularly useful for photographers working on a large set of images, such as those from a photoshoot or event.
Customizing Presets for Your Style
Customizing Portra 400 presets to suit your personal photography style is a great way to ensure that your images reflect your unique aesthetic. By accessing the Develop module in Lightroom and experimenting with different settings, you can tweak the presets to achieve the perfect look tailored to your preferences. The process will take you only a few minutes, compared to the time-intense developing process of actual film stock.
Once you’ve created a preset that matches your style, you can apply it to your images to maintain a cohesive look across your portfolio.
Comparing Portra 400 with Other Film Presets
While Portra 400’s look is undeniably distinctive, it’s crucial to compare it with other popular film presets, including:
-
Fuji Pro
-
Polaroid
-
VSCO
-
Kodachrome
Each of these presets offers its unique characteristics, making it essential to explore the differences and determine which film look best suits your photography style and needs.
Portra 400 vs. Fuji Pro
When comparing Portra 400 and Fuji Pro film presets, some key differences emerge. Portra 400 has a more muted color palette compared to the more vibrant and saturated look of Fuji Pro. Additionally, Portra 400 has a more natural grain structure, whereas Fuji Pro has an artificial grain structure.
These differences make Portra 400 better suited for natural, muted tones and hues, while Fuji Pro is best suited for vibrant, saturated colors.
Portra 400 vs. Polaroid
Portra 400 and Polaroid film presets also exhibit some notable differences. Portra 400 has a more natural color palette than Polaroid, which has a more vintage look. Additionally, Portra 400 has a more subtle grain structure, whereas Polaroid has a more pronounced grain.
These differences make Portra 400 better suited for detailed shots and portrait photography, while Polaroid is more suitable for quick shots and provides a unique vintage look.
Portra 400 vs. VSCO
Portra 400 and VSCO film presets also have their unique characteristics. Portra 400 has a more muted color palette compared to VSCO, which has a more vibrant and saturated appearance. Additionally, Portra 400 has a more natural grain structure, whereas VSCO has a more artificial grain.
These differences make Portra 400 better suited for natural, muted tones and hues, while VSCO provides a wider range of vibrant and saturated colors.
Portra 400 vs. Kodachrome
Finally, when comparing Portra 400 and Kodachrome film presets, some differences should be noted. Portra 400 has a muted color palette compared to Kodachrome’s more vibrant and saturated look. Additionally, Portra 400 has a natural grain structure, while Kodachrome has an artificial grain.
These differences make Portra 400 better suited for natural, muted tones and hues, whereas Kodachrome is best suited for bright, sunny conditions with more saturated colors.
Summary
In conclusion, Portra 400 Lightroom presets provide photographers with an invaluable tool for replicating the iconic film look in their digital images. With numerous preset packs available, as well as the opportunity to create your own custom preset, there’s never been a better time to explore the world of Portra 400 film presets. Whether you’re a professional photographer or an enthusiast looking to enhance your images, the timeless aesthetic of Portra 400 can elevate your photography to new heights.
Frequently Asked Questions
What is the classic Portra 400 look?
Portra 400 is known for its vivid colors, high contrast, and subtle grain, creating a vibrant palette with a natural warmth.
How can I create my own Portra 400 preset in Lightroom?
Create your own Portra 400 preset in Lightroom by adjusting color settings, refining grain and contrast, and experimenting with different settings until you find the look you're after.
Can I use Portra 400 presets on my mobile device?
Yes, you can use Portra 400 presets on your mobile device through the Lightroom mobile app.
How do Portra 400 presets compare to other film presets like Fuji Pro and Polaroid?
Portra 400 presets offer a more natural and muted palette compared to the saturated look of Fuji Pro and the vintage aesthetic of Polaroid.
Can I use Portra 400 presets for batch editing multiple photos at once?
Yes, you can use Portra 400 presets for batch editing multiple photos at once. This allows you to apply the same set of edits or adjustments to several images at a time, providing uniformity and saving time.

